Customizing the firmware
The Home Assistant Glow's firmware is built on ESPHome, a platform designed for customization through simple YAML configurations. Whether you need to tweak the device's functionality or adapt it for different use cases, the process is straightforward. This guide will walk you through how to adopt the device and customize its firmware using the ESPHome Dashboard.
Adopting the Device
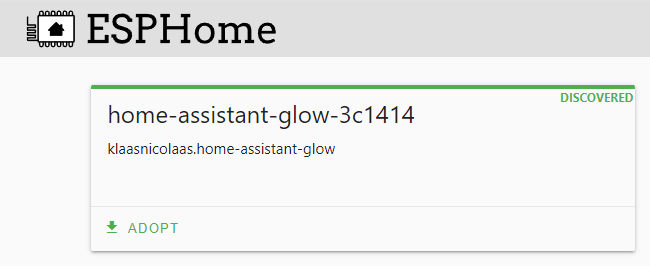
Before making any changes to the firmware, you first need to adopt the device into the ESPHome. Once your ESPHome Dashboard is up and running, and the Home Assistant Glow is connected to your local network, you should see an option to adopt it.
Following the adoption steps will automatically:
- Create a unique ESPHome configuration file for your device.
- Set up a secure API encryption key, allowing communication between Home Assistant and your device.
- Embed your Wi-Fi credentials directly into the firmware, enabling automatic reconnections.
- Upload the customized firmware onto the Home Assistant Glow.
Understanding the Configuration
Component Structure
To make the firmware manageable and adaptable to different hardware setups, it is organized into distinct "components." Each major function of the device is isolated in its own YAML file. The base configuration includes several important components:
basis.yaml: Handles the basic, essential functionality of the device.pulse_meter.yaml: Manages pulse metering, useful for tracking energy usage.status_led.yaml: Controls the status LED, allowing you to customize its behavior or color based on the device's state.updates.yaml: Provides Over-the-Air (OTA) update capabilities, making it easy to update firmware without physical access.
These components can be found in the GitHub repository.
Making Your First Customization
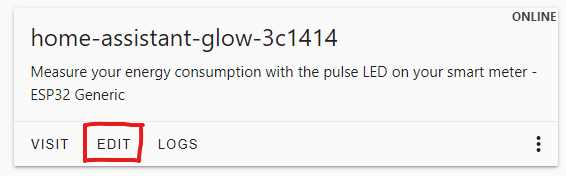
Once your device is adopted, you can start customizing its behavior by editing the configuration files. In the ESPHome dashboard, click on EDIT next to the device to open the YAML editor, where you can modify the configuration directly.
In the YAML editor, you'll see the default configuration for your Home Assistant Glow. You can make changes here or add new functionality by extending existing components. For instance, to modify the behavior of the pulse_meter, you could use the !extend feature.
Here's an example of adding an internal_filter to the pulse meter configuration:
sensor:
  - id: !extend sensor_energy_pulse_meter
    internal_filter: 100ms